
Review · AUSTRALIA PHOTO TOURS & PHOTOSHOOTS
Afternoon Brisbane Photography Courses
Good photos start with better choices. This small-group Brisbane photography course turns a city walk into a practical camera lesson, using the Story Bridge, Brisbane Wheel, South Bank, parks, and waterfront as your working subjects. I like the personal group size of no more than 10 people, and I like that the class welcomes DSLR, compact camera, and smartphone users alike.
The course is especially useful if you want to move beyond auto mode without getting buried in technical jargon. The main consideration is that you must bring your own camera, and the three-hour description may run closer to the stated 2 hours 30 minutes, so do not book it as a tightly timed activity between other plans.
Key points to know before booking
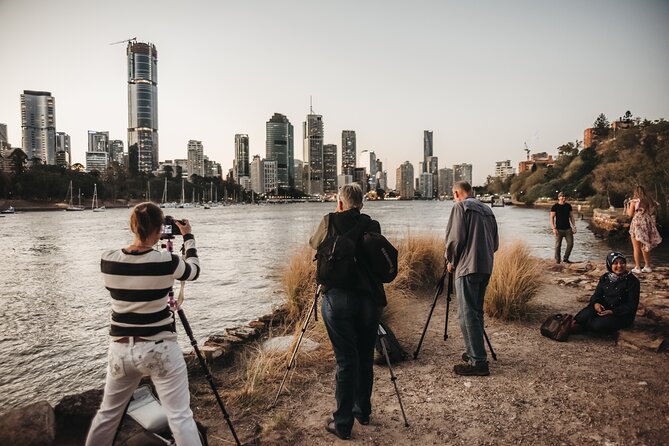
- Small groups of 10 or fewer: You get more chances to ask questions and receive direct help with your camera.
- Starts at 2:00 pm: Meet at 285 Ann Street, near the Brisbane Visitors Centre in central Brisbane.
- Manual camera practice: Learn aperture, shutter speed, focus, framing, and creative use of angles.
- Brisbane landmarks as your classroom: The route takes in views connected with the Story Bridge, Brisbane Wheel, South Bank, parks, skyline, and waterfront.
- Suitable for beginners and intermediates: The course can help a first-time manual user, while also giving experienced amateurs fresh ways to see the city.
- Bring your own equipment: Camera hire, food, drinks, hotel pickup, and hotel drop-off are not included.
Starting at 285 Ann Street with your camera ready
The afternoon begins at 2:00 pm at 285 Ann Street, Brisbane City. This is a central meeting point, and the activity ends back there, so you can plan your onward transport without arranging a separate pickup.
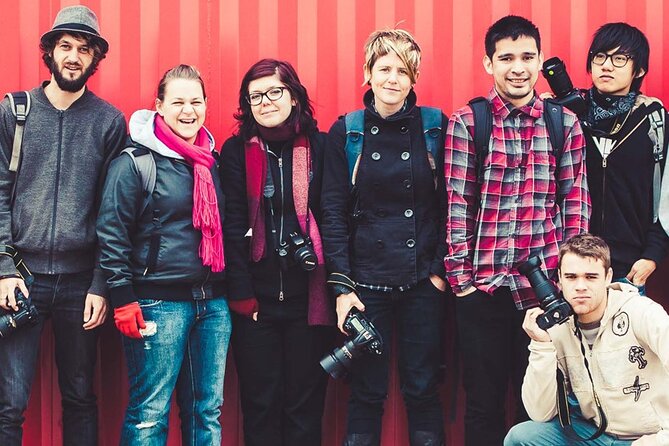
You meet a professional photographer and the rest of your group before setting off. The group limit matters here. A photography lesson works best when the instructor can look at your settings, answer a quick question, or suggest a new angle without making you wait behind a large crowd.
The opening part is about getting comfortable with your own equipment. That may mean checking basic controls on a DSLR, compact camera, or smartphone before you start walking. You are not expected to arrive with specialist knowledge. The course is designed to help you understand what your camera can do and to give you enough confidence to try those controls in real conditions.
One particularly useful feature is the focus on moving away from automatic settings. Auto mode is handy, especially when you are rushing between sights, but it also makes many decisions for you. Here, you begin to see how your choices affect brightness, sharpness, motion, and the overall feel of a photo.
A few more photo experiences around Australia worth a look
- Yarra Valley Sunrise Balloon Flight with GoPro Photos
★ 5.0 · 506 reviews - Melbourne Sunrise Hot Air Balloon Ride with GoPro Photos
★ 5.0 · 263 reviews - Gold Coast: 1-Hour Jet Ski Ride -No slow zones + Free Photos
★ 4.8 · 203 reviews
Learning aperture and shutter speed in real conditions
Technical lessons make more sense when you can use them straight away. Instead of sitting in a classroom discussing settings in the abstract, you walk into Brisbane and test them against actual buildings, people, open spaces, and changing views.
Aperture affects how much of the picture looks sharp and how much appears softer behind your subject. You might use one approach for a close street portrait and another for a broad city view. The class introduces this idea in a way that connects directly to the pictures you are making.
Shutter speed controls how your camera deals with movement and time. It can help you keep a moving subject sharp, or let you experiment with a different sense of motion. The supplied information does not promise a particular set of camera exercises, so the exact examples will depend on the guide, the group, and the conditions that afternoon. Still, the course gives you time to test the ideas rather than simply hear them explained.
You also learn about focus, framing, and composition. These skills are useful on every trip. A technically sharp photo can still feel flat if the subject is poorly placed or the edges of the frame are distracting. Your guide can help you notice those issues before you press the shutter.
The course notes are included, which gives you something to refer to after the walk. That is a small but worthwhile benefit. Camera settings are easy to forget once you return to sightseeing, and written notes can help you repeat the exercises later.
From ANZAC Square toward Brisbane’s best photo views
The class begins in central Brisbane, with ANZAC Square identified as an early point where the photography work gets going. From there, the city itself supplies the subjects.
ANZAC Square can give you a useful first test area because it combines open space, formal features, and city surroundings. It is the sort of place where you can work on composition before tackling bigger views. Your guide, Nicky, challenged an intermediate couple to try manual camera settings during this part of the experience, showing that the class is not only for complete beginners.
That detail is important if you already understand basic photography. You should not assume the course will be limited to pointing and shooting. The stated aim is to help you develop your own decisions, and an intermediate photographer can use the walk to refine technique rather than start from zero.
As you move through the city, the emphasis shifts from camera controls to seeing. You are encouraged to change your angle, alter your viewpoint, and frame familiar places in less predictable ways. A well-known landmark does not automatically make a good photograph. The work comes from choosing what to leave out, where to stand, and how to use the surrounding space.
Story Bridge, the Brisbane Wheel, and skyline views
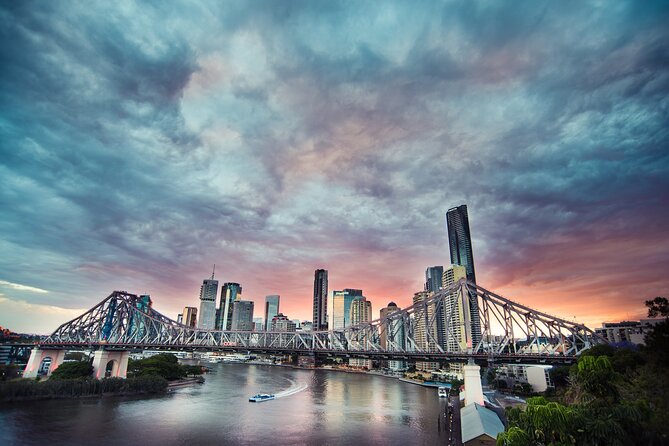
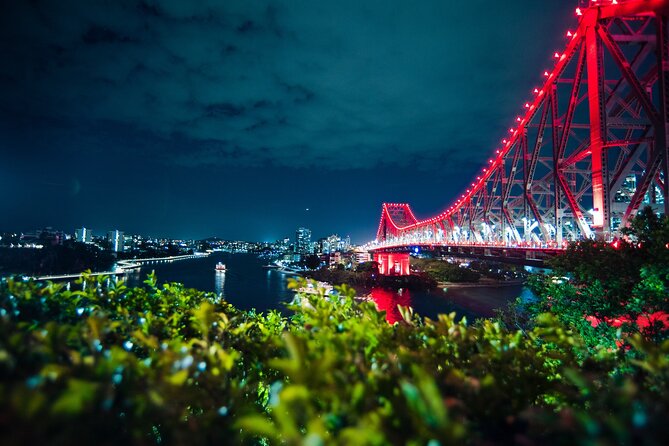
The Story Bridge gives the course a strong subject for lines, structure, scale, and distance. Its shape can help you think about how a frame leads the eye. It also gives you a chance to consider how much of the surrounding Brisbane skyline belongs in the picture.
The Brisbane Wheel offers a different type of subject. Its circular form can become a framing element, a central point, or part of a broader city scene. You may find that changing your position has a bigger effect than changing your camera settings. That is one of the useful lessons in guided photography: sometimes the best improvement comes from taking a few steps, lowering your viewpoint, or waiting for a cleaner arrangement.
South Bank adds parks, waterfront views, and a different pace from the central streets. Here you can work on scenic photography, people-focused images, and the relationship between open space and buildings. The supplied details do not promise specific portrait subjects or exact stops, but the course does include street portraits among the styles you can explore.
You should expect to walk while carrying your own equipment. The route is described as a walking tour through the city, so comfortable shoes and a camera setup you can carry for several hours are sensible choices. Food and drinks are not included, so have any refreshments you need before the start or plan them for afterward.
Same place, a different kind of shoot:
- Gold Coast: Surfers Paradise Parasailing with Free Photos
★ 4.7 · 118 reviews - Gold Coast: 30-Minute Jet Ski – No Slow Zones – Free Photos
★ 4.7 · 49 reviews - Sydney: Private Photoshoot outside the Opera House
★ 4.6 · 40 reviews - Sydney Photography Course in the Historic Rocks Area
★ 5.0 · 35 reviews
Why the small group makes a difference
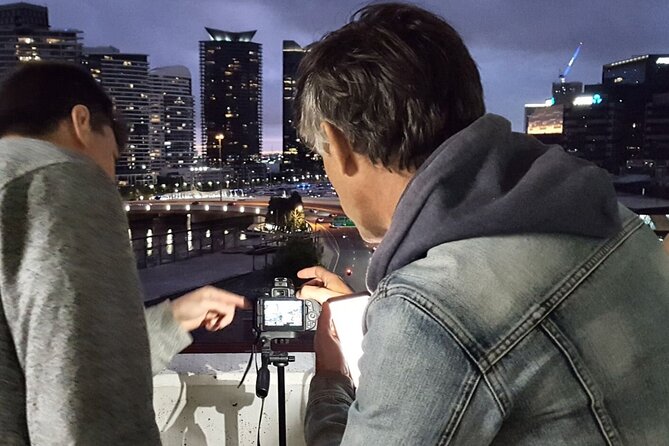
A maximum of 10 people is one of the strongest features of this activity. Photography questions are often personal. Your camera may use different controls from the person beside you, and your comfort level may be very different from theirs.
In a large class, you might hear a general explanation and then struggle to apply it to your own camera. In this smaller format, you have a better chance of getting direct help with aperture, shutter speed, focusing, or framing. The group size also makes it easier for the guide to notice when someone needs a second explanation.
The class still cannot provide unlimited one-to-one tuition. Ten people is small for a walking activity, but it is not a private lesson. If you want every frame assessed or need detailed instruction on advanced equipment, a private session may suit you better. For a short introduction to manual shooting and city photography, though, the size is practical.
The available feedback points to two clear strengths: people gained confidence using manual settings, and beginners felt better able to operate their cameras without depending on auto mode. That is a useful result because confidence often determines whether you keep practicing after a holiday.
Is $78.18 good value for a 2.5 to 3-hour class?
At $78.18 per person, this costs more than an ordinary sightseeing walk, but you are paying for instruction as well as a route through Brisbane. The value depends on how much you want to improve your photography.
If you only want quick snapshots of the city, the price may be hard to justify. Brisbane’s public views can be enjoyed without a paid guide, and your phone can take perfectly pleasant pictures on its own.
If you have a camera that you rarely use properly, the calculation changes. A professional tutor can help you understand settings in a single afternoon, then give you examples to practice later. The course notes add some lasting value, and the small group means your fee is buying more than a general talk.
The price also makes sense for couples or friends with different levels of experience. One person can be learning basic camera controls while the other works on composition and perspective. The class is not described as a private experience, so you should be comfortable learning alongside other people.
Because the activity is booked well ahead on average, it is wise to reserve it before your Brisbane visit if the afternoon timing suits your plans. Free cancellation is available up to 24 hours before the start time, but changes or cancellations inside that window are not accepted and are not refunded.
Who will get the most from this Brisbane course?
This is a good fit if you own a DSLR, compact camera, or smartphone and want practical help using it. It is also a sensible choice if you have recently bought a camera and keep falling back on automatic settings.
Beginners should find the course approachable because no previous experience is required. You can learn the basic vocabulary, practice simple controls, and photograph recognizable Brisbane subjects while the instruction is fresh.
Intermediate photographers may also benefit, particularly if they want a fresh way to see the city or need more confidence with manual exposure. The course may feel basic if you already work comfortably with aperture, shutter speed, focus, and composition every day. Even then, the walking format can give you new ideas about angles and perspective.
This is less suitable if you dislike walking, need hotel transportation, or do not want to carry your own camera. It is also not a food tour, a private photo shoot, or a broad history tour of Brisbane. The city sights are there to support the photography lesson.
What to bring and how to prepare
Bring the camera you actually want to learn. That could be a digital SLR, compact camera, or smartphone. The activity does not include camera equipment, so do not arrive expecting rental gear.
Before the class, make sure you know how to turn your device on, and bring any necessary battery or charging accessories you normally use. The provided details do not list extra equipment requirements, so keep your setup simple and easy to carry.
Wear comfortable walking shoes. The course lasts roughly 2 hours 30 minutes, with the main description calling it a three-hour masterclass, so allow a full afternoon rather than planning something immediately afterward.
You may also want to think about what you hope to improve. If your main issue is blurry pictures, ask about shutter speed. If your photos feel flat, ask about composition and viewpoint. If you always use auto mode, say so early. Clear questions help the guide focus the limited class time on what matters to you.
Final verdict: should you book it?
Book this course if you want to see Brisbane while learning how to make better pictures, especially if you are ready to leave auto mode behind. The combination of a professional tutor, small group, course notes, and well-known city subjects gives the afternoon real practical value.
I would be more cautious if you want a private advanced workshop, a relaxed sightseeing tour with little instruction, or transport from your hotel. For beginners and intermediate photographers who want useful skills they can keep using after Brisbane, $78.18 is a fair price for a focused afternoon.
FAQ
Where does the Brisbane photography course start?
It starts at 285 Ann Street, Brisbane City, Queensland 4000, near the Brisbane Visitors Centre in central Brisbane.
What time does the course begin?
The stated start time is 2:00 pm.
Where does the activity finish?
The course ends back at the meeting point in central Brisbane.
How long does the photography course last?
The duration is approximately 2 hours 30 minutes. It is also described as a three-hour photography tour, so allow roughly 2.5 to 3 hours.
What landmarks can I photograph?
The course includes views connected with the Story Bridge, Brisbane Wheel, South Bank, Brisbane’s skyline, waterfront, and parks.
Is the course suitable for beginners?
Yes. No previous photography experience is required, and the course is suitable for DSLR, compact camera, and smartphone users.
Can intermediate photographers join?
Yes. The instruction covers composition, camera settings, lighting, focus, angles, and perspective, so intermediate users can practice more deliberate manual shooting.
Do I need to bring my own camera?
Yes. Camera equipment is not included, so you must bring your own DSLR, compact camera, or smartphone.
Is hotel pickup provided?
No. Hotel pickup and drop-off are not included. You must make your own way to the meeting point.
How many people can join the course?
The group is limited to a maximum of 10 people.
Are food and drinks included?
No. Food and drinks are not included in the price.
What is included in the price?
The price includes a professional photography tutor or guide and course notes.
Can I cancel for a full refund?
Yes, if you cancel at least 24 hours before the experience start time. Cancellations made less than 24 hours before the start time are not refunded.
What happens if the minimum group size is not reached?
If the activity is canceled because the minimum number of participants is not met, you will be offered a different date or experience, or a full refund.
Just added around Australia
- Great Ocean Road Tour with Instagram Sunset views of 12 Apostles★ 5.0 · 7 reviews
- Mt Field and Styx Valley Photography Tour★ 4.5 · 3 reviews
- Photography and Nature in Cairns Botanic Gardens Let’s Go Buggin★ 5.0 · 19 reviews
- Sydney: Personal Travel & Vacation Photographer★ 5.0 · 7 reviews
- Romantic photoshoot for couples in Sydney★ 5.0 · 2 reviews
- Professional photoshoot at The Rocks in Sydney★ 5.0 · 4 reviews
- Melbourne: City Photoshoot/Photowalk around CBD★ 4.9 · 9 reviews
- Melbourne: Brighton Beach/Bathing Boxes Photoshoot★ 5.0 · 2 reviews
Australia Photo Tours & Photoshoots, compared.
Yarra Valley Sunrise Balloon Flight with GoPro Photos
Read our review →
Melbourne Sunrise Hot Air Balloon Ride with GoPro Photos
Read our review →
Gold Coast: 1-Hour Jet Ski Ride -No slow zones + Free Photos
Read our review →
Gold Coast: Surfers Paradise Parasailing with Free Photos
Read our review →
Gold Coast: 30-Minute Jet Ski – No Slow Zones – Free Photos
Read our review →
Browse the lists this shoot appears in