Review · NIGHT & ASTRO PHOTOGRAPHY
Private Tour: Night Photography Tour in London
London looks better after dark. This three-hour private walk turns the South Bank and Westminster into a hands-on night photography class, with professional photographer Lou guiding you from the London Eye to Big Ben, the Thames, and Westminster Bridge. I like the one-to-one camera tuition and the carefully chosen river views, where you can practice long exposures, reflections, light trails, and composition in real conditions. The main drawback is price: at $337.60 per person, it makes the most sense if you are serious about improving your photos or sharing the cost with a private group.
I also like that the tour is adjusted to your camera and skill level. Beginners can learn basic settings without embarrassment, while more experienced photographers can work on framing, shutter speed, and creative effects. You should expect plenty of walking, changing weather, and a tour that suits people who want to learn rather than simply collect a few quick snapshots.
Key points at a glance
- Private tuition with Lou: The instruction is exclusive to your group, and Lou works with compact cameras, DSLRs, and other camera types.
- A strong run of London views: The route includes the London Eye, Big Ben, the Houses of Parliament, St Paul’s Cathedral, the Thames, and Jubilee Bridge.
- Night skills you can reuse: You practice slow shutter speeds, light trails, reflections, exposure changes, action shots, and composition.
- Three hours at a relaxed pace: The walk covers roughly 3 hours, with time to stop and make photographs instead of rushing from sight to sight.
- Bring the right gear: A charged battery, spare memory cards, and a tripod are recommended. Tripod hire may be available after booking.
- Best for a focused photography outing: The private format works especially well for beginners who need patient help or photographers with a specific goal.
Why London at night works so well
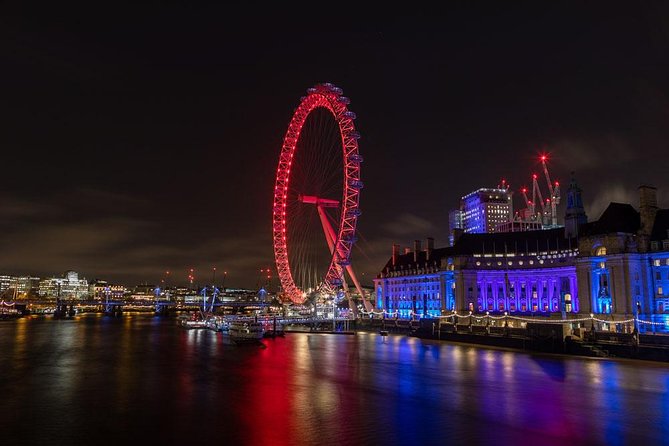
This is not just a sightseeing walk with a camera in your hand. The route gives you changing kinds of light within a short distance. The Thames reflects illuminated buildings, traffic creates streaks of color, and landmarks such as the London Eye give you strong shapes to frame against the evening sky.
The setting also helps you understand why night photography is different. Your camera may need a slower shutter speed, a different exposure, and steadier support than you use during the day. Lou’s job is to show you those changes in practice, using the camera you actually own.
That last point matters. Many photography classes explain general principles but leave you to translate them to your own controls later. Here, the tuition is geared to your equipment. The supplied information says Lou knows a multitude of camera types, and the feedback consistently praises her patience, calm teaching style, and ability to help people with different cameras.
The tour has earned a five-star rating from 48 reviews, with 100 percent recommending it. That does not mean every participant will become a night photographer in three hours. It does suggest that the teaching and personal attention are the strongest parts of the outing.
More Photography Tours in London
- Private Night Photography Tour in London
★ 5.0 · 29 reviews - Photography Tour walking the back streets of London’s West End (3 hours)
★ 5.0 · 24 reviews - London Photography Tour – Private Tour
★ 5.0 · 17 reviews
Starting beside the London Eye
The meeting point is London Eye Waterloo Pier, near the South Bank. This is a practical place to begin because the first part of the route already gives you one of London’s most recognizable subjects.
The opening South Bank section lasts about 45 minutes. You work with views of Big Ben, the Houses of Parliament, and the London Eye across and along the river. Instead of taking one standard postcard picture, you can try different compositions and learn how the light changes the mood of the scene.
This opening section is useful for setting up your camera. If you are new to night photography, Lou can help you move beyond automatic mode and understand what your camera is doing. One participant who had recently bought a first SLR said the instruction was excellent but admitted that limited preparation made it harder to get the full benefit. That is sound advice: you do not need experience, but you will gain more if you know where the basic controls are.
You should also expect to take many photographs. Bring extra memory cards and a fully charged battery, or a spare battery. Night shooting often involves repeated attempts with different settings, so running out of storage or power would be a needless nuisance.
The London Eye and the art of slow exposure
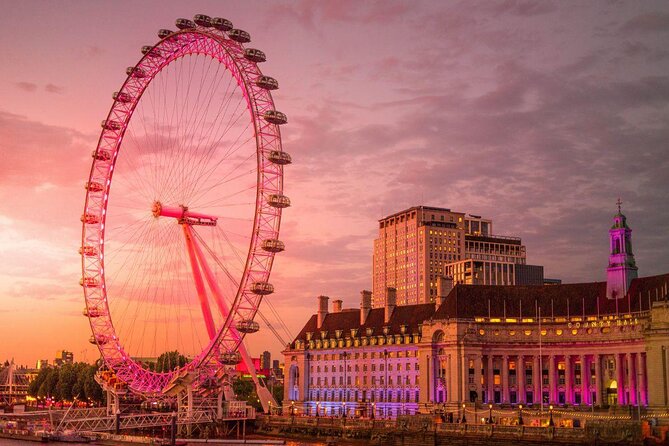
The next stop focuses on the London Eye for about 30 minutes. Its slow rotation makes it a useful subject for learning how shutter speed changes a photograph.
A fast exposure can freeze part of the wheel. A slower one can suggest movement and make the illuminated capsules appear to glide through the frame. Lou can show you how to change exposure times and try different angles, rather than leaving you with one fixed formula.
This is one of the most valuable parts for a beginner. You can see the result of a camera adjustment almost at once. Instead of hearing an abstract explanation of shutter speed, you make one image, change the setting, and compare the effect.
The timing may also include blue hour, twilight, and low light during warmer months. That gives you more than full darkness. Blue hour can bring color to the sky while the city lights begin to glow, often producing a more balanced photograph than a completely black background.
The London Eye is a popular subject, so creativity matters. Lou’s guidance on viewpoint, light, color, and framing can help you make an image that feels personal rather than merely familiar.
Along the Thames toward Jubilee Bridge
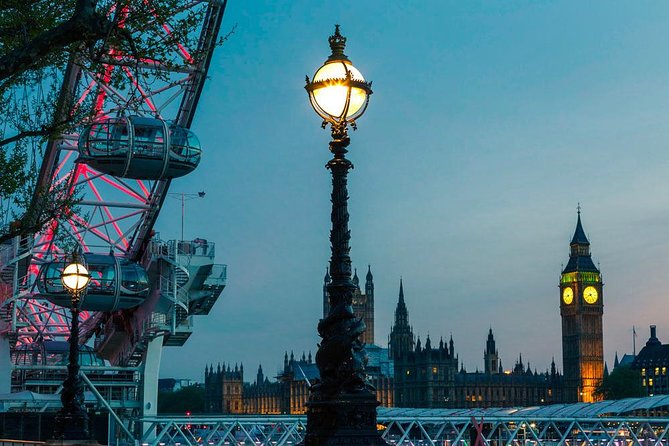
The walk continues along the Thames for about 15 minutes toward Jubilee Bridge. This short section adds movement and variety. You can photograph people, buildings, the river, and the illuminated structures of Royal Festival Hall, the National Theatre, and the British Film Institute.
The river is the main lesson here. Reflections can stretch and break across the water, and a long exposure can smooth the surface into a glass-like effect. These are classic night photography techniques, but the route gives you real subjects to practice on.
The relaxed pace is important. A private walk does not force everyone to stop for the same number of photographs. If one composition needs extra attention, you have a better chance of working through it than you would on a large group sightseeing tour.
The route remains urban and public, with plenty of activity around the South Bank. If you want a quiet, solitary photography session, this may feel busy. If you like having people, architecture, lights, and river reflections in the same frame, that activity gives you more material.
More Photography Tours in the UK
- Iconic London Photo Walking Tour
★ 4.6 · 11 reviews - A Professional Photo Walk Experience in London
★ 5.0 · 4 reviews - Colourful Notting Hill Photography Tour
★ 5.0 · 3 reviews
Jubilee Bridge for the wide city view
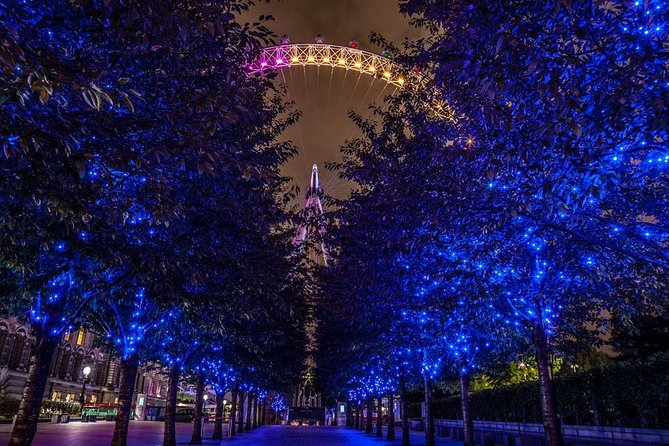
At the Golden Jubilee Bridges, the viewpoint changes. You are no longer working only at river level. The elevated position lets you frame Westminster, the Houses of Parliament, Big Ben, the London Eye, and St Paul’s Cathedral in broader compositions.
This is a good place to think about layers. The river can form the foreground, the illuminated buildings can create the middle distance, and the evening sky can complete the frame. Lou can help you decide what to include and what to leave out.
The bridge section lasts about 15 minutes, so you should not expect a long session at every landmark. The advantage is variety. You move through several types of viewpoint during one evening, giving you a set of photographs with different moods and structures.
A tripod is recommended for this kind of work. It helps keep the camera steady during long exposures and makes it easier to repeat a composition while testing different settings. If you do not want to carry one through London, tripod rental may be arranged after booking. Confirm that option directly when you reserve.
Royal Festival Hall and moving subjects
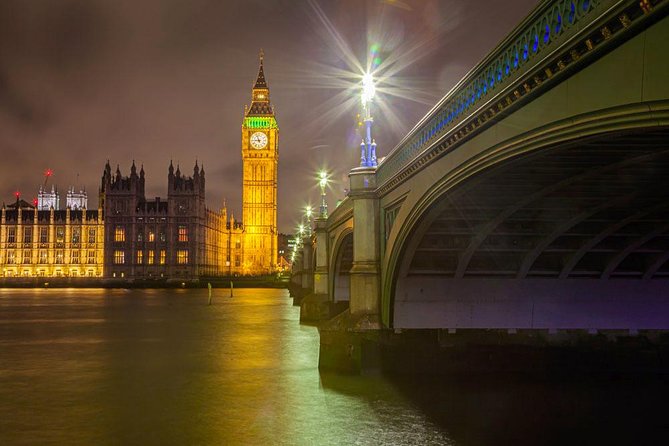
The Royal Festival Hall stop adds a different challenge: the colorful skateboard park. Here, the aim is not only to capture buildings and reflections. You can practice freezing action with a faster shutter speed, then try slower exposures that blur movement and create atmosphere.
This is a useful change of pace. Night photography can become too focused on statuesque buildings, but moving people and action force you to make quicker decisions. You need to judge timing, focus, and shutter speed in a way that a static landmark does not demand.
The stop lasts about 15 minutes, so it is a short lesson rather than a full sports photography class. Still, it gives your evening more range and may produce images that feel less predictable than the standard London skyline shot.
Big Ben and the Houses of Parliament
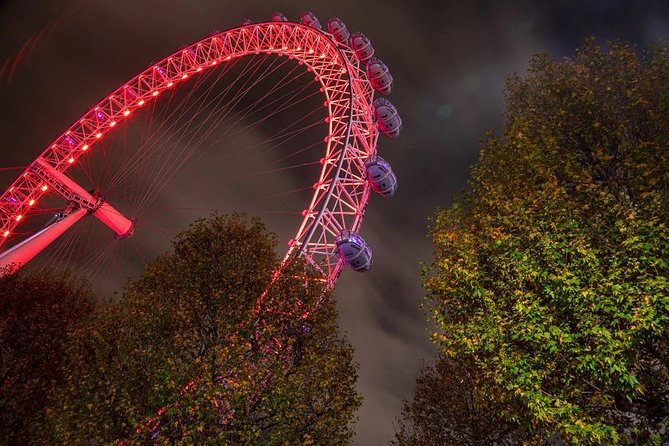
Across the river, Big Ben and the Houses of Parliament provide the historic centerpiece of the walk. The architecture is strongly lit and easy to recognize, but strong photographs still depend on composition.
Lou can help you work with mood, framing, and the relationship between the old building and the surrounding modern city. The goal is not simply to point at Big Ben. You can use the river, bridge lines, open sky, and nearby lights to create a more considered image.
The Houses of Parliament section follows for about 15 minutes. It gives you time to treat the building as more than a famous backdrop. The shape, windows, towers, and illumination can all affect how the photograph feels.
This is also where a private lesson pays off. If you prefer architecture, you can spend more time refining those images. If you are already comfortable with buildings, you can ask for help with a more creative approach, such as changing the angle or balancing the historic structure with present-day London.
Westminster Bridge and traffic light trails
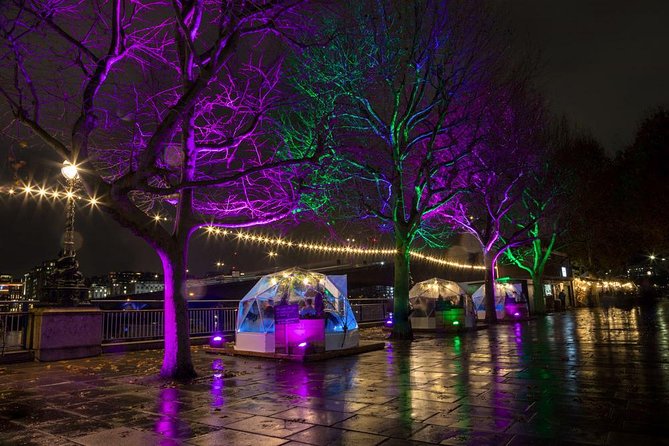
Westminster Bridge is one of the clearest teaching locations on the route. Moving traffic gives you a chance to create flowing light trails with a slow shutter speed.
This technique can look complicated until you see the relationship between traffic, timing, and exposure. The bridge gives you an active subject and a recognizable setting, so your practice has a clear purpose.
You may need several attempts. A passing bus, a gap in traffic, or a change in exposure can alter the result. That is normal. The value of having Lou beside you is that you can adjust the camera, review the image, and try again without guessing alone.
The tour includes a review of your photographs and advice on developing your skills. That makes the evening more useful than a series of disconnected camera tips. You can look at what worked, spot problems, and carry the lesson into later photographs in London, Paris, or at home.
Victoria Embankment and the final London Eye view
The final section takes you to Victoria Embankment, where you photograph the London Eye from across the river. This view shows the wheel as a full circle and puts it into a wider riverside setting.
Here you can return to ideas introduced earlier: slow exposures, color, reflections, movement, framing, and composition. Repeating a subject from a new position helps you see how much the viewpoint affects the photograph.
The tour ends near Westminster Tube Station, at Underground Ltd on Bridge Street. That is convenient for continuing your evening or returning to your accommodation. The route does not loop back to the London Eye, so plan your meeting and end points accordingly.
Because the walk operates in all weather, dress for conditions rather than relying on a mild forecast. Rain can affect comfort, handling, and reflections. You need to protect yourself and your camera, and a tripod can be awkward on wet or crowded pavement.
What the $337.60 price really buys
The stated price is $337.60 per person. That is a high cost for a three-hour walk if you want only sightseeing or a few souvenir photos.
The value changes if you use the tour as a private lesson. You are paying for an experienced fine art photographer, personal tuition, help with your own camera, route planning, and time at several strong photo locations. A private group can also make the cost easier to justify, especially since group discounts are available.
The most praised elements are Lou’s patience, camera knowledge, and ability to adapt the evening to each person. One beginner said the tour helped them move beyond shooting everything in automatic mode and continue taking better night photographs independently. Another participant specifically valued the tripod rental because it made it possible to travel light.
I would book this if you want lasting skills, not just a guided walk. If you already know your camera well, you should arrive with a clear goal, such as traffic trails, blue hour, reflections, or architectural composition. If you are new to photography, bring your camera manual or know the basic menu layout so the three hours are spent making photographs rather than searching for controls.
Who should book this private walk
This tour suits:
- Beginners who want calm, hands-on help with a new camera
- Intermediate photographers who want better night settings and compositions
- Couples, families, or friends who prefer a private outing
- Visitors who want major London views without navigating the route alone
- Photographers who want practical instruction rather than a lecture
- Anyone willing to walk outdoors for about three hours in changing weather
It may not suit you if you dislike technical instruction, have no interest in adjusting camera settings, or want a short sightseeing tour with minimal walking. It also may feel expensive for a casual phone photographer, although the tour is suitable for all camera types, including compact cameras.
The private format is the key advantage. You can ask basic questions without holding up a large group, or move faster if you already understand exposure. The tour is offered in English, and most people can take part. Service animals are allowed, and the route is near public transportation.
What to bring for better results
Bring your own camera, a fully charged battery, and extra memory cards. You may take more photographs than expected while testing exposure times and angles.
A tripod is recommended for long exposures. If carrying one through London is inconvenient, ask about hiring one after booking. Dress for the weather, since the tour runs in all conditions.
You do not need to be an expert. The strongest practical lesson from the feedback is that beginners can produce impressive photographs, but preparation helps. Know how to change basic settings if possible, and think about what you want to learn before the evening starts.
Free cancellation is available when you cancel at least 24 hours before the start time. Changes or cancellations made later are not accepted for a refund.
Should you book the London night photography tour?
Book it if you want London landmarks and real camera practice in the same evening. The route is well chosen, the private format gives you room to learn at your own pace, and Lou’s patient teaching is the clearest reason to pay the premium.
Skip it if you only want a quick evening stroll or if $337.60 per person feels too high for a sightseeing outing. For a beginner, an eager amateur, or a photographer who wants stronger night images of London, this is a focused and useful way to spend three hours.
FAQ
How long is the private London night photography tour?
The tour lasts approximately three hours.
Where does the tour start?
It starts at London Eye Waterloo Pier in London.
Where does the tour end?
The tour ends near Westminster Tube Station, at Underground Ltd on Bridge Street.
What camera can I bring?
The tour is suitable for all camera types, from compact cameras to DSLRs. The professional photographer can provide instruction geared to the camera you own.
Do I need photography experience?
No. The tour is suitable for all skill levels, including beginners. It is helpful to arrive with a charged camera and some familiarity with its basic controls.
Is a tripod required?
A tripod is recommended for night photography, especially for long exposures. Tripod hire may be available if you contact the provider after booking.
What happens if the weather is bad?
The tour operates in all weather conditions, so you should dress appropriately and prepare your camera equipment for the forecast.
Is the tour private?
Yes. Only your own group participates, and the photography tuition is exclusive to you or your personal group.
More Private Photoshoots in the UK
- London: Private Photography with Professional Photographer
★ 5.0 · 7 reviews - London Photography Masterclass – Private Photography Lesson
★ 5.0 · 6 reviews - Private Photoshoot in Edinburgh with a Professional Photographer
★ 4.5 · 43 reviews - Edinburgh Photography Masterclass – Private Photography Lesson
★ 5.0 · 40 reviews
More Private Photoshoots in London
- London: Private Photoshoot with Video Clip Option
★ 4.8 · 182 reviews - Private landmarks photoshoot for families and couples
★ 5.0 · 92 reviews - London: Private Landmark Tour with Professional Photographer
★ 4.7 · 91 reviews - Professional Private Couple Photoshoot
★ 5.0 · 35 reviews
Just added around London
- Iconic London Photo Walking Tour★ 4.6 · 11 reviews
- Flying dress professional photoshoot with pro photographer★ 5.0 · 5 reviews
- London: East End Instagrammable Street Art & Graffiti Tour★ 4.9 · 22 reviews
- Colourful Notting Hill Photography Tour★ 5.0 · 3 reviews
- London: Private Photography with Professional Photographer★ 5.0 · 7 reviews
- A Professional Photo Walk Experience in London★ 5.0 · 4 reviews
- Wildlife Photography Workshop in Richmond Park in London★ 4.5 · 5 reviews
- Beginners Photography Course – Small Group Workshop★ 5.0 · 8 reviews
Night & Astro Photography, compared.
Tokyo by Night Photography Tour (Private Option Available)
Read our review →
Akaroa: Stargazing Tour with 2 Telescopes & Souvenir Photos
Read our review →